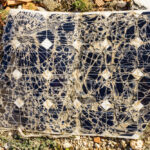
How to effectively troubleshoot common solar panel system problems, including diagnosing issues like low power output, shading effects, and inverter malfunctions, and finding cost-effective solutions, is crucial for maximizing the efficiency and lifespan of your solar investment. This guide provides a comprehensive approach to identifying and resolving common solar panel system issues, from simple visual inspections to more in-depth electrical measurements. We’ll explore the functionality of each system component, delve into diagnosing specific problems, and outline cost-effective solutions for maintaining optimal performance. Understanding these troubleshooting techniques empowers homeowners and technicians alike to keep their solar systems running smoothly and efficiently.
By systematically addressing potential problems, from minor shading issues to major inverter malfunctions, you can ensure your solar panel system continues to generate clean energy at its peak capacity. This guide provides clear, step-by-step instructions and practical advice, enabling you to confidently tackle common challenges and optimize your solar energy production.
Understanding Solar Panel System Components
A solar panel system comprises several interconnected components working in harmony to convert sunlight into usable electricity. Understanding the function and potential failure points of each component is crucial for effective troubleshooting and preventative maintenance. This section details the key components, their roles, and common issues.
Solar Panel System Components and Their Functions
The following table summarizes the major components of a typical solar panel system and their respective functions.
| Component | Function | Common Failure Points | Associated Symptoms |
|---|---|---|---|
| Solar Panels | Capture sunlight and convert it into direct current (DC) electricity. | Cell damage (cracks, hotspots), shading, degradation, wiring issues. | Reduced power output, uneven panel performance, visible damage. |
| Inverters | Convert the DC electricity from the panels into alternating current (AC) electricity, suitable for household use. | Overheating, component failure, software glitches, grid issues. | No power output, system shutdown, erratic power fluctuations, error codes. |
| Wiring and Connectors | Transport the electricity from the panels to the inverter and then to the electrical panel. | Corrosion, loose connections, damaged insulation, rodent damage. | Intermittent power, reduced output, arcing, electrical hazards. |
| Mounting System | Securely mounts the solar panels to the roof or ground, ensuring optimal sun exposure. | Corrosion, structural failure, loose bolts, improper installation. | Panel movement, tilting, damage to panels. |
Common Failure Points and Associated Symptoms
Understanding the common failure points of each component allows for quicker diagnosis and repair. For instance, a significant drop in overall system output might indicate a faulty inverter, while localized power reduction points to a problem with specific panels. Regular visual inspections can help identify issues like cracked panels or loose connections before they escalate into major problems.
System Monitoring and Preventative Maintenance
Modern solar systems often incorporate monitoring systems that track performance data, such as panel voltage, current, and overall power output. Data logging provides valuable insights into system health, allowing for early detection of anomalies. For example, a gradual decrease in power output over time might indicate panel degradation, while sudden drops could signal a wiring fault or inverter malfunction. This data-driven approach enables proactive maintenance, preventing costly repairs and ensuring optimal system efficiency. Regular system checks, guided by the monitoring data, are essential for preventative maintenance and extending the lifespan of the entire solar energy system.
Diagnosing Low Power Output
Low power output from a solar panel system is a common problem with several potential causes. Effective troubleshooting requires a systematic approach, combining visual inspection with precise measurements to isolate the faulty component. This process minimizes unnecessary repairs and ensures a swift return to optimal system performance.
Visual Inspection
Begin by conducting a thorough visual inspection of the entire system. This initial step often reveals readily apparent issues. Check for any obvious damage to the solar panels themselves, such as cracks, discoloration, or debris accumulation. Inspect the wiring for any loose connections, damaged insulation, or signs of rodent activity. Examine the inverter for any error codes displayed on its screen or any unusual sounds or smells emanating from the unit. Finally, look for any shading on the panels, which can significantly reduce power output, even with just partial shadowing. Document your observations with photos or notes for future reference.
Measuring Voltage and Current
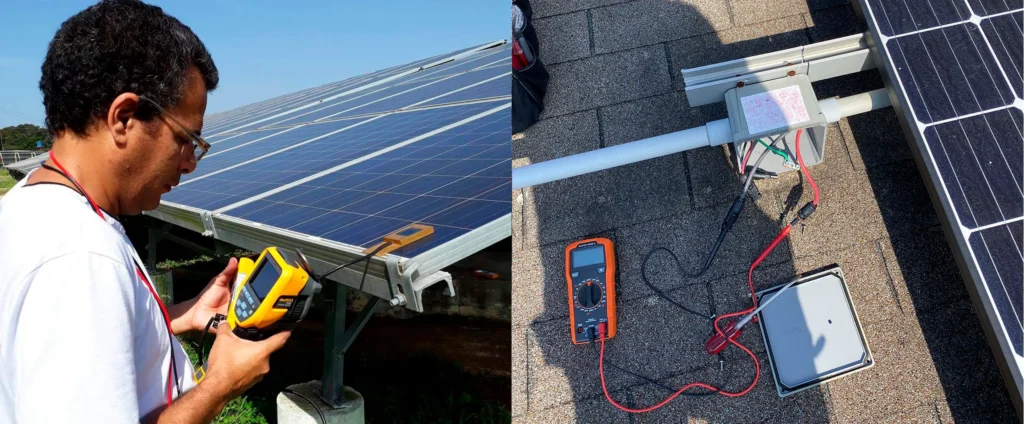
Once the visual inspection is complete, proceed to measure voltage and current at various points in the system. This requires a multimeter capable of measuring both DC and AC voltage and current. Safety precautions are crucial: always disconnect the system from the grid before taking any measurements and exercise caution when working with electricity.
Voltage and Current Measurement Points
- At the Solar Panel Array: Measure the voltage and current at the output terminals of each individual panel and the combined output of the entire array. Low voltage on a single panel indicates a problem with that specific panel. Low current across the entire array suggests a problem with the wiring, inverter, or other system components.
- At the Combiner Box: Measure the voltage and current at the output of the combiner box. This helps to isolate problems within the array from issues further downstream.
- At the Inverter Input: Measure the voltage and current at the inverter’s input terminals. Discrepancies between these measurements and those taken at the combiner box indicate a problem with the wiring between the two.
- At the Inverter Output: Measure the AC voltage and current at the inverter’s output. Low AC voltage or current suggests an inverter malfunction or a problem with the grid connection.
Interpreting Measurement Data
Comparing voltage and current measurements at different points in the system allows for the precise identification of the problem’s location. For example, if the voltage is low at the panel level but normal at the combiner box, it indicates a problem with that specific panel or its wiring. If the voltage is normal at the panel level and the combiner box but low at the inverter input, it indicates a problem with the wiring between the combiner box and the inverter. Similarly, low AC voltage at the inverter output points to an inverter issue. Recording all measurements in a table facilitates comparison and analysis. Remember that voltage and current values should be compared to the manufacturer’s specifications for the system components.
Diagnostic Flowchart for Low Power Output
A flowchart can visually represent the diagnostic process. The flowchart would begin with the visual inspection step. If no obvious problems are found, the flowchart would direct the user to measure voltage and current at various points. Based on the measurements obtained, the flowchart would then guide the user to identify the potential source of the problem (e.g., faulty panel, damaged wiring, inverter malfunction). Each branch of the flowchart would lead to a specific troubleshooting action, such as replacing a faulty panel, repairing damaged wiring, or replacing the inverter. This structured approach ensures a thorough and efficient diagnostic process. The flowchart would end with a confirmation of the problem and the necessary corrective action.
Identifying and Mitigating Shading Effects
Shading, even on a single solar panel, significantly impacts the overall performance of a solar panel system. This is because solar panels are wired in series or parallel strings; a shaded panel acts like a bottleneck, reducing the current flow throughout the entire string. This leads to a substantial drop in energy production, far greater than the simple loss of power from the shaded area itself. Understanding the causes and implementing effective mitigation strategies is crucial for maximizing system efficiency and return on investment.
Even partial shading can drastically reduce the power output of an entire string of solar panels. This is due to the way panels are wired together – a single shaded cell can act like a resistor, severely limiting the current flowing through the entire string. The effect is disproportionately large, resulting in a far greater loss of energy than simply the area covered by the shade.
Shading Mitigation Techniques
Several methods exist to mitigate the negative effects of shading on solar panel systems. The choice of technique depends on factors such as the severity and location of the shading, the existing system configuration, and budget constraints. A cost-benefit analysis is usually necessary to determine the optimal solution.
Comparison of Shading Mitigation Solutions
The following table compares the cost-effectiveness and efficiency of various shading mitigation techniques. Costs are relative and can vary significantly based on system size, location, and installer pricing. Efficiency is measured by the degree to which the mitigation technique reduces the overall power loss from shading.
| Mitigation Technique | Cost-Effectiveness | Efficiency | Description |
|---|---|---|---|
| Optimal Panel Arrangement | Low | Moderate | Careful planning during installation to minimize shading. This might involve adjusting panel angles or positions to avoid known shading sources. |
| Microinverters | Medium-High | High | Each panel has its own microinverter, allowing it to operate independently. Shading on one panel doesn’t affect others. |
| Power Optimizers | Medium | High | Similar to microinverters but generally less expensive. Optimizers maximize energy harvest from each panel, even with partial shading. They still require a central inverter. |
| Pruning or Removal of Obstructions | Variable | High | Removing trees or other obstructions causing shade. Cost depends on the scale of the work required. |
Identifying Shaded Panels
Identifying shaded panels involves a combination of visual inspection and electrical measurements. Visual inspection should be conducted at different times of the day to account for the changing position of the sun. Look for panels that appear noticeably darker or cooler than others.
Electrical measurements using a multimeter can confirm the suspicion of shading. Measure the voltage and current of each panel individually or each string. Significantly lower voltage or current in a specific panel or string compared to others strongly indicates shading. A qualified solar technician can perform these measurements and provide a more detailed analysis.
Troubleshooting Inverter Malfunctions
Inverters are the crucial link between your solar panels and your home’s electrical system, converting DC power from the panels into usable AC power. Malfunctions can significantly impact your system’s performance, leading to reduced energy production or even complete system failure. Understanding common inverter issues and effective troubleshooting techniques is essential for maintaining a smoothly operating solar power system.
Inverter malfunctions manifest in various ways, often accompanied by error codes displayed on the inverter’s screen. These codes provide valuable clues to diagnose the underlying problem. Resetting the inverter is often the first troubleshooting step, but more extensive diagnostics might be necessary depending on the persistence of the issue. Using a multimeter allows for a more in-depth assessment of the inverter’s functionality and helps determine if repair or replacement is the most cost-effective solution.
Common Inverter Malfunctions and Error Codes
Many inverter manufacturers use standardized error codes, but the specific codes and their meanings vary depending on the brand and model. Generally, codes indicate issues such as overheating, grid connection problems, DC input problems, or internal faults. Consulting your inverter’s manual is crucial for understanding the specific meaning of any error codes displayed. For example, a code indicating “Over-temperature” suggests the inverter is overheating, possibly due to poor ventilation or high ambient temperatures. A code signifying “Grid Fault” might indicate a problem with the connection to your home’s electrical grid.
Resetting and Troubleshooting Inverter Problems
Before attempting any troubleshooting, always disconnect the inverter from the electrical grid for safety. The specific steps for resetting your inverter will be detailed in your owner’s manual. Generally, this involves switching the inverter off, waiting a few minutes, and then switching it back on. If the problem persists after a reset, check all connections to ensure they are secure and free of corrosion. Inspect the cooling fans to ensure they are functioning correctly. If the problem continues, further diagnostic steps may be needed.
Verifying Inverter Functionality Using Multimeter Readings
A multimeter is an invaluable tool for verifying inverter functionality. With the inverter disconnected from the grid, you can use the multimeter to check for DC voltage at the input terminals and AC voltage at the output terminals. Comparing these readings to the specifications in your inverter’s manual will indicate if the inverter is receiving adequate power from the solar panels and producing the expected AC output. For example, if the DC input voltage is significantly lower than expected, it could point to problems with the solar panels or wiring. Low AC output voltage, on the other hand, could indicate an internal inverter problem. Always follow safety precautions when using a multimeter and consult a qualified electrician if you are unsure about any procedures.
Determining Inverter Repair versus Replacement
The decision to repair or replace an inverter depends on several factors, including the age of the inverter, the cost of repair, and the warranty status. Minor issues, such as loose connections or minor internal faults, may be cost-effectively repaired. However, if the inverter is old, repairs are extensive, or the cost of repair approaches the cost of replacement, then replacement is often the more sensible option. A qualified solar technician can assess the situation and provide expert advice on the best course of action. For instance, a relatively new inverter with a simple fault might be more economically repaired, while an older inverter with multiple issues might be better replaced with a newer, more efficient model.
Cost-Effective Solutions and Preventative Maintenance
Maximizing the return on your solar panel investment requires not only a well-designed system but also proactive maintenance and cost-effective upgrades. Regular upkeep and minor improvements can significantly extend the lifespan of your system and boost its energy production, leading to substantial long-term savings. This section outlines practical strategies to achieve these goals.
Effective preventative maintenance is crucial for maximizing the lifespan and efficiency of your solar panel system. By addressing minor issues before they escalate into major problems, you can significantly reduce the risk of costly repairs and downtime. Furthermore, a well-maintained system will produce more energy over its lifetime, resulting in a quicker return on your initial investment.
Cost-Effective Ways to Improve System Efficiency and Longevity
Several inexpensive measures can dramatically improve your solar panel system’s performance and longevity. These strategies often involve simple adjustments or readily available components, minimizing the financial burden while maximizing the benefits.
- Regular Cleaning: Accumulated dirt, leaves, and bird droppings can significantly reduce solar panel efficiency. Regular cleaning, ideally every 3-6 months depending on location and climate, can restore a substantial portion of lost energy production. A simple solution of water and mild detergent applied with a soft brush is usually sufficient. Avoid harsh chemicals that could damage the panel surfaces.
- Shade Mitigation: Even minimal shading can drastically impact overall system output. Identifying and addressing shading sources, whether it’s tree branches, building structures, or even other panels, is crucial. Solutions range from simple trimming of overhanging branches to more involved strategies like installing shade-tolerant panels or strategic panel placement during system design.
- Optimizing Panel Angle and Orientation: The angle and orientation of your solar panels significantly affect their energy capture. While this is optimally addressed during initial installation, minor adjustments might be possible to improve performance based on seasonal changes in sunlight angle. Consulting with a solar professional for advice is recommended before making any alterations.
- Monitoring System Performance: Regularly monitoring your system’s output using your inverter’s monitoring tools or dedicated apps provides early warnings of potential problems. This allows for timely intervention, preventing small issues from becoming major headaches. Tracking energy production over time helps identify any gradual decline in performance, prompting necessary maintenance or repairs.
The Importance of Regular System Cleaning and Inspection
Regular cleaning and inspection are the cornerstones of preventative maintenance. A clean system operates at peak efficiency, while regular inspections identify potential issues before they become major problems.
Regular cleaning removes dirt, debris, and other contaminants that accumulate on the panels, reducing their ability to absorb sunlight. This can lead to a significant drop in energy production, impacting your overall savings. A visual inspection allows you to identify potential problems such as loose wiring, damaged panels, or signs of corrosion. Early detection of these issues can prevent more extensive and costly repairs down the line.
Preventative Maintenance and Reduced Repair Costs
Proactive preventative maintenance significantly reduces the likelihood of costly repairs. Addressing minor issues before they escalate saves money and minimizes system downtime.
Regular maintenance is far cheaper than emergency repairs.
For example, a small crack in a panel, if left unattended, can lead to further damage, potentially requiring the replacement of the entire panel. Early detection through regular inspection allows for timely repair, avoiding a more expensive replacement. Similarly, loose wiring, if not addressed, can lead to electrical hazards and system malfunctions. Regular checks prevent such issues, ensuring the safe and efficient operation of your system.
Recommended Preventative Maintenance Schedule
| Task | Frequency | Notes |
|---|---|---|
| Visual Inspection | Monthly | Check for loose wires, damaged panels, and signs of corrosion. |
| Panel Cleaning | Quarterly (or more frequently depending on climate) | Use water and a soft brush; avoid harsh chemicals. |
| Inverter Check | Semi-annually | Verify proper operation and check for error codes. |
| Professional Inspection | Annually | A qualified technician can perform a thorough system assessment. |
Illustrating Common Problems
Understanding the practical application of troubleshooting techniques is crucial. Let’s examine real-world scenarios to solidify our understanding of common solar panel system issues. These examples highlight the symptoms, diagnostic process, and potential solutions.
Faulty Inverter Causing Low Power Output
Imagine a homeowner noticing a significant drop in their home’s energy production from their solar panel system. The digital display on their inverter shows a “fault” code, and the system’s overall power output is drastically reduced, despite seemingly clear weather conditions and no visible damage to the panels. The homeowner checks the circuit breakers, confirming they are all engaged. Further investigation reveals that the inverter’s internal fan is running unusually loudly, and the inverter casing feels noticeably warmer than usual. These are classic symptoms of an overheating inverter, potentially due to a failing internal component. Diagnostic steps would involve checking the inverter’s manual for troubleshooting codes, inspecting the inverter’s connections for loose wires or corrosion, and potentially using a multimeter to check the DC voltage input from the panels and the AC voltage output from the inverter. If the multimeter readings are significantly lower than expected, this strongly suggests an internal inverter problem. A qualified technician should then be contacted to assess the inverter and determine whether repair or replacement is necessary. Replacing the inverter is often the most cost-effective solution in this scenario, especially if the inverter is nearing the end of its expected lifespan.
Shading Effects Reducing System Performance
Consider a system installed on a roof partially shaded by a large tree. The shading isn’t uniform; some panels are in full sun, while others receive only dappled sunlight or are entirely in shadow. The impact on the system is not simply a proportional reduction in output. Even a small amount of shading on a single panel can significantly reduce the power output of the *entire string* that panel is connected to. This is due to the series wiring of solar panels: a single shaded panel acts like a bottleneck, limiting the current flowing through the entire string. Visual inspection reveals that one string of panels, located directly under the tree’s branches, shows significantly lower voltage readings than the other strings. The overall system output is reduced by approximately 20%, even though only a fraction of the total panel area is shaded. Mitigation involves either trimming the branches to eliminate shading or, ideally, implementing a more sophisticated system design that incorporates microinverters or power optimizers. These devices allow individual panels to operate at their optimal power point regardless of shading on other panels in the string, thus maximizing energy production. The cost of this upgrade is usually offset by the long-term increase in energy generation.
Last Word
Successfully troubleshooting solar panel system problems requires a systematic approach combining visual inspection, electrical measurements, and a clear understanding of system components. By following the steps outlined in this guide, you can effectively diagnose issues like low power output, shading effects, and inverter malfunctions. Implementing cost-effective solutions and establishing a regular preventative maintenance schedule will significantly extend the lifespan of your system, ensuring reliable and efficient solar energy generation for years to come. Remember, proactive maintenance is key to maximizing your return on investment and minimizing costly repairs.
