How to choose siding that is installed by a qualified professional is a crucial decision impacting your home’s curb appeal, durability, and long-term value. This guide navigates the complexities of siding selection and installation, empowering you to make informed choices. We’ll explore various siding materials, from the classic appeal of wood to the low-maintenance benefits of vinyl and the durability of fiber cement, considering factors like cost, lifespan, and regional climate suitability. Furthermore, we’ll delve into identifying reputable contractors, understanding the installation process, and ensuring a smooth, problem-free project from start to finish.
Understanding the nuances of professional siding installation is key to avoiding costly mistakes and ensuring a lasting, aesthetically pleasing result. We’ll cover essential aspects such as proper flashing, caulking, and trim work, highlighting the visual differences between a high-quality installation and a subpar one. This detailed exploration will equip you with the knowledge to confidently manage your siding project, securing a beautiful and durable exterior for years to come.
Identifying Qualified Siding Professionals
Choosing the right siding installer is crucial for a long-lasting, beautiful, and functional exterior. A poorly installed siding job can lead to costly repairs, water damage, and decreased home value. Therefore, thorough vetting of potential contractors is essential. This section will guide you through the process of identifying qualified siding professionals.
Siding Installer Qualifications
Several key qualifications should be considered when selecting a siding installer. These qualifications demonstrate competence, professionalism, and commitment to quality workmanship. They provide a benchmark against which to measure potential contractors. This ensures a smoother project and minimizes potential risks.
- Licensing: Check with your local authorities to verify that the contractor holds the necessary licenses to operate in your area. Licensing often indicates adherence to local building codes and standards.
- Insurance: Ensure the contractor carries both general liability and workers’ compensation insurance. This protects you from financial liability in case of accidents or damage during the installation process.
- Experience: Look for installers with a proven track record of successful siding installations. Inquire about the number of years they’ve been in business and the types of siding they’ve worked with.
- References and Reviews: Request references from previous clients and check online review platforms like Yelp or Google Reviews to gauge customer satisfaction.
- Warranty: A reputable installer will offer a warranty on their workmanship and materials. Understand the terms and conditions of the warranty before signing any contracts.
Questions to Ask Potential Contractors
Asking the right questions can reveal a contractor’s expertise, professionalism, and attention to detail. These inquiries provide valuable insights beyond basic qualifications. Clear and direct communication ensures a mutual understanding of expectations and responsibilities.
- What is your experience with installing [type of siding you’ve chosen]? (This demonstrates specific knowledge of the chosen material.)
- Can you provide examples of your previous work, including photos and client references? (This verifies claims of experience and quality.)
- What is your process for preparing the surface before siding installation? (This reveals understanding of crucial preparatory steps.)
- What type of warranty do you offer on your workmanship and materials? (This clarifies the contractor’s commitment to quality and longevity.)
- What is your estimated timeline for completing the project, and what is your contingency plan for unexpected delays? (This showcases project management skills and preparedness.)
Comparison of Siding Installer Credentials
The following table compares different types of siding installer credentials, highlighting their advantages and disadvantages. Understanding these differences helps in making an informed decision when selecting a contractor. The table provides a structured overview for easy comparison.
| Credential | Advantages | Disadvantages | Notes |
|---|---|---|---|
| National Association of the Remodeling Industry (NARI) Certification | Demonstrates commitment to professional standards and ongoing training. | May not be universally recognized in all areas. | Often requires experience and testing. |
| Local Contractor Licensing | Ensures compliance with local building codes and regulations. | Standards can vary significantly between jurisdictions. | Verification is crucial through local authorities. |
| Years of Experience | Indicates practical skills and knowledge gained through on-the-job experience. | Doesn’t guarantee quality or adherence to best practices. | Should be coupled with other credentials and references. |
| Positive Online Reviews | Provides feedback from past clients, reflecting customer satisfaction. | Can be manipulated or influenced by various factors. | Should be considered in conjunction with other qualifications. |
Siding Material Selection
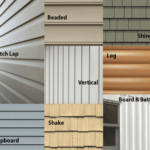
Choosing the right siding material is a crucial decision impacting your home’s aesthetics, durability, and long-term cost. This section will explore the key differences between common siding materials, helping you make an informed choice based on your home’s needs and your budget. We will examine factors such as cost, lifespan, maintenance requirements, and suitability for various climates and architectural styles.
Siding Material Comparison: Cost, Durability, and Maintenance
Vinyl Siding
Vinyl siding is a popular choice due to its affordability and low maintenance. It’s resistant to rot, insects, and moisture, requiring minimal upkeep beyond occasional cleaning. However, it’s less durable than other options, susceptible to damage from impact and extreme temperatures, and can fade over time. Its relatively short lifespan and limited aesthetic versatility should be considered. The cost is generally lower upfront compared to wood or fiber cement.
Wood Siding
Wood siding offers a classic, natural look and can significantly enhance a home’s curb appeal. It’s a durable material with a long lifespan when properly maintained. However, wood requires regular maintenance, including painting or staining every few years, to protect it from rot, insect infestation, and weathering. The initial cost is typically higher than vinyl, and it’s more susceptible to damage from moisture and pests.
Fiber Cement Siding
Fiber cement siding combines the durability of cement with the workability of wood. It’s highly resistant to fire, rot, insects, and moisture, making it a low-maintenance and long-lasting option. Its cost is higher than vinyl but often less than wood, especially considering its longevity. It’s available in various styles and colors, offering design flexibility. However, it’s heavier than vinyl and requires professional installation due to its weight and fragility.
Metal Siding
Metal siding, typically made of aluminum or steel, is exceptionally durable and resistant to damage from impact, fire, and harsh weather conditions. It’s also low-maintenance and requires minimal upkeep. The initial cost is generally high, but its long lifespan and low maintenance needs can offset this over time. Metal siding is available in a variety of colors and styles, but it can dent and its appearance may be affected by scratches.
Factors Influencing Siding Material Choice
Selecting the appropriate siding material necessitates careful consideration of several key factors. Climate plays a significant role, with materials like fiber cement and metal being ideal for areas prone to extreme weather conditions. Architectural style should also be a primary factor, ensuring the chosen siding complements the home’s design. Personal preferences regarding aesthetics, maintenance requirements, and budget constraints should also be factored into the decision-making process.
Siding Lifespan and Warranty Information
The following table summarizes the typical lifespan and warranty options for different siding materials. Note that warranties can vary significantly between manufacturers and specific product lines.
| Siding Material | Typical Lifespan (Years) | Typical Warranty (Years) | Warranty Considerations |
|---|---|---|---|
| Vinyl | 20-30 | 10-25 | Warranties often cover defects but not damage from impact or extreme weather. |
| Wood | 30-50+ (with proper maintenance) | Varies greatly by manufacturer and type of wood | Warranty coverage is highly dependent on the type of wood and the manufacturer’s specifications. |
| Fiber Cement | 50-80 | 15-50 | Warranties often cover defects in materials and workmanship. |
| Metal | 50+ | 20-30+ | Warranties typically cover rust and corrosion. |
The Installation Process
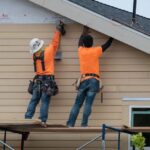
Professional siding installation is a multi-step process requiring precision and expertise. A successful installation ensures both the aesthetic appeal and the longevity of your home’s exterior. Understanding the key steps and potential pitfalls can help homeowners make informed decisions and choose qualified installers.
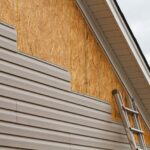
Proper preparation is paramount to a successful siding installation. This involves thoroughly inspecting the existing wall structure, ensuring it’s sound and free from rot or damage. Any necessary repairs, such as replacing damaged sheathing or addressing moisture issues, must be completed before siding installation begins. This preventative measure ensures a solid foundation for the new siding and prevents future problems. Failure to adequately prepare the surface can lead to premature siding failure and costly repairs down the line.
Preparation and Underlayment
Before any siding goes up, the existing wall surface needs a thorough inspection. This includes checking for any damage to the sheathing, water damage, or insect infestation. Any issues found need to be addressed before proceeding. Next, a weather-resistant barrier, often a housewrap or felt paper, is installed. This underlayment acts as an additional layer of protection against moisture intrusion, improving the overall performance and longevity of the siding system. Properly installed underlayment is crucial for preventing water damage, which can lead to mold growth and structural problems. The underlayment is carefully overlapped and secured to the wall to ensure complete coverage.
Siding Installation Techniques
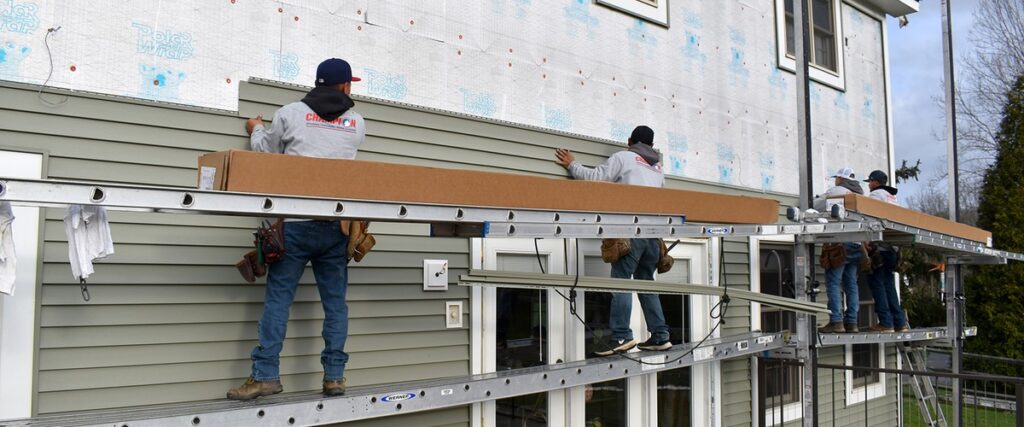
The installation process itself varies depending on the type of siding being used. However, common steps include measuring, cutting, and installing the siding panels according to the manufacturer’s instructions. Each panel is meticulously attached to the wall using appropriate fasteners, ensuring proper alignment and spacing. Professional installers pay close attention to details such as flashing around windows and doors, ensuring a watertight seal. Improper installation can lead to gaps, allowing water to penetrate, leading to rot and damage. A qualified installer understands the importance of proper flashing and caulking to create a water-resistant barrier.
Common Installation Mistakes
Several common mistakes can significantly impact the quality and longevity of a siding installation. Using incorrect fasteners, inadequate flashing around windows and doors, and insufficient attention to proper overlapping of siding panels are frequent issues. These oversights can compromise the weather resistance of the siding system, leading to water damage, mold growth, and premature deterioration. Qualified professionals understand the importance of following manufacturer’s specifications meticulously and employing best practices to prevent these mistakes. For example, using nails that are too short can lead to the siding pulling away from the wall, while incorrect flashing can allow water to penetrate behind the siding.
Tools and Equipment
A professional siding installer typically uses a variety of tools and equipment to ensure a precise and efficient installation. This includes:
- Measuring tapes and levels
- Circular saws and jigsaws for cutting siding panels
- Nail guns and drills for fastening
- Caulk guns and various types of caulk
- Safety equipment, including safety glasses, gloves, and harnesses
- Scaffolding or ladders for safe access to higher areas
- Utility knives for cutting and trimming
- Power washers for cleaning the surface before installation
The use of appropriate tools and equipment is essential for ensuring the accuracy and efficiency of the installation process. The right tools not only speed up the work but also minimize the risk of errors that can lead to problems later on.
Cost and Budgeting
Planning the budget for your siding project is crucial to ensure a smooth and financially responsible process. Understanding the various cost components will help you make informed decisions and avoid unexpected expenses. Accurate budgeting requires considering both material and labor costs, as well as potential unforeseen factors.
The total cost of professional siding installation is a combination of material costs and labor charges. Material costs vary widely depending on the type of siding chosen (vinyl, fiber cement, wood, metal, etc.), its quality, and the quantity needed to cover your home’s exterior. Labor costs are influenced by factors such as the complexity of the job (e.g., intricate architectural details, large surface area), the installer’s experience and location, and the prevailing market rates for labor in your area. It’s important to obtain multiple detailed estimates from reputable contractors to compare pricing and ensure you’re getting a fair deal.
Cost Breakdown of Siding Installation
Several factors significantly influence the overall cost. The size of your house directly impacts material requirements and labor hours, leading to a higher price for larger homes. The complexity of your home’s exterior, including multiple levels, dormers, or intricate trim work, increases labor time and therefore cost. The chosen siding material itself has a dramatic effect; premium materials like fiber cement or cedar will be considerably more expensive than vinyl. Finally, your geographical location affects both material and labor costs due to variations in supply and demand, transportation expenses, and local regulations.
Cost Estimates for Different Siding Materials
The following table provides estimated cost ranges for different siding materials and installation methods. These are averages and may vary based on location, project specifics, and contractor pricing. Always obtain multiple quotes for a personalized cost estimate.
| Siding Material | Material Cost (per sq ft) | Labor Cost (per sq ft) | Total Estimated Cost (per sq ft) |
|---|---|---|---|
| Vinyl | $1-$4 | $2-$5 | $3-$9 |
| Fiber Cement | $3-$8 | $4-$8 | $7-$16 |
| Wood (Cedar) | $5-$15 | $6-$10 | $11-$25 |
| Metal (Aluminum or Steel) | $4-$10 | $5-$9 | $9-$19 |
Note: These are estimates and actual costs may vary significantly depending on project specifics and geographical location. Always obtain multiple quotes from qualified contractors.
Warranty and Maintenance
Choosing siding involves a significant investment, and understanding the role of warranties and proper maintenance is crucial for protecting that investment and ensuring the longevity of your home’s exterior. Warranties provide a safety net against manufacturing defects and faulty workmanship, while regular maintenance prevents costly repairs down the line. Both are key considerations when selecting both siding materials and a contractor.
Warranties and guarantees offer vital protection for both the siding materials and the installation work. Manufacturer warranties typically cover defects in materials, while contractor warranties cover the quality of their installation. It’s essential to carefully review all warranty documents, paying close attention to the duration of coverage, what is covered, and any exclusions. For instance, a manufacturer’s warranty might cover material defects for 20 years, but exclude damage caused by improper installation or extreme weather events. Similarly, a contractor’s warranty might cover their workmanship for a specific period, such as one year, but might not cover issues resulting from material defects. Always obtain written warranties from both the manufacturer and the contractor, and keep these documents readily accessible.
Siding Material Maintenance Requirements
Different siding materials require varying levels of maintenance. Understanding these requirements is essential for preserving the appearance and structural integrity of your siding. Neglecting maintenance can lead to premature deterioration and costly repairs.
- Vinyl Siding: Vinyl siding is generally low-maintenance. Regular cleaning with a hose and mild detergent is usually sufficient. Avoid using abrasive cleaners or high-pressure washers, as these can damage the siding’s surface. Occasional inspections for cracks or damage are recommended.
- Fiber Cement Siding: Fiber cement siding is more durable than vinyl but requires more attention. It should be cleaned periodically with a soft brush and water, and occasional repainting might be necessary to maintain its appearance and protect it from the elements. Inspect for cracks or damage, especially around fasteners.
- Wood Siding: Wood siding demands the most maintenance. It requires regular painting or staining to protect it from moisture damage and insect infestation. Cleaning may involve more specialized treatments depending on the type of wood and finish. Regular inspections are crucial to identify and address any signs of rot or insect damage promptly.
- Metal Siding: Metal siding is extremely durable and low-maintenance. It typically only needs occasional cleaning with soap and water. However, inspections for dents, scratches, or corrosion are still recommended.
Identifying Signs of Siding Damage
Early detection of siding damage is crucial for preventing further deterioration and costly repairs. Regular inspections are essential, especially after severe weather events.
- Cracks and Gaps: Visible cracks or gaps in the siding indicate potential water intrusion and structural compromise. These should be addressed immediately.
- Loose or Damaged Fasteners: Loose or damaged nails or screws can lead to siding failure. Tightening or replacing these fasteners is important.
- Water Stains or Rot: Dark stains or signs of rot indicate moisture damage. This is a serious issue requiring prompt professional attention.
- Insect Infestation: Evidence of insect activity, such as holes or insect droppings, necessitates professional inspection and treatment.
- Peeling Paint or Stain (Wood Siding): Peeling paint or stain on wood siding indicates a need for repainting or restaining to protect the wood from the elements.
Visual Examples of Professional Siding Installation
A picture is worth a thousand words, and when it comes to siding installation, seeing the difference between excellent and poor workmanship is crucial. This section provides detailed descriptions of what constitutes high-quality siding installation, highlighting key visual indicators of a job well done, and contrasting it with the telltale signs of a subpar installation. Understanding these visual cues will empower you to make informed decisions and ensure your investment is protected.
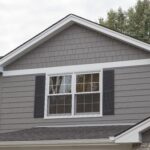
High-quality siding installations are characterized by meticulous attention to detail, creating a seamless and aesthetically pleasing exterior. This is evident in several key areas: proper flashing, precise caulking, and flawlessly executed trim work. The overall impression should be one of neatness, precision, and a uniform appearance across the entire surface. Conversely, poorly installed siding will often display inconsistencies, gaps, and evidence of shoddy craftsmanship.
Proper Flashing and Caulking
Proper flashing is critical in preventing water damage. In a professionally installed siding system, flashing is meticulously installed around windows, doors, and other penetrations in the wall. It should be completely concealed beneath the siding, with no visible gaps or overlaps. Caulking is another crucial element. High-quality installations demonstrate neat, consistent caulking lines, free of gaps or excessive amounts of sealant. These lines should be smooth and even, blending seamlessly with the siding material. In contrast, a poorly installed system might show exposed flashing, gaps in the caulking, or excessively thick, uneven caulking lines, all indicating potential water infiltration points. Imagine a meticulously applied bead of caulk around a window frame, perfectly smooth and consistent, compared to a messy, uneven, and incomplete application, with gaps clearly visible. The difference is stark and indicative of the installer’s skill and attention to detail.
Precise Trim Work
Trim work is a defining feature of professional siding installation. Sharp, clean lines, precise mitered corners, and consistent spacing between trim pieces are hallmarks of quality workmanship. The trim should be perfectly aligned with the siding, creating a cohesive and visually appealing finish. Poorly installed trim will often be misaligned, have uneven gaps, and show evidence of sloppy cutting or fastening. For instance, consider the difference between perfectly mitered corner boards, seamlessly meeting to form a crisp 45-degree angle, and poorly cut boards with noticeable gaps and uneven lines. The difference in visual appeal is immediately obvious.
Overall Appearance and Consistency
A professionally installed siding job exhibits a uniform appearance across the entire surface. The siding panels should be consistently spaced, with no visible gaps or overlaps. The seams should be straight and aligned, and the overall impression should be one of neatness and precision. Poorly installed siding will often display uneven spacing, misaligned panels, and noticeable gaps. The overall appearance will be uneven and untidy. Visualize a house with siding panels perfectly aligned, evenly spaced, and exhibiting a consistent color and texture, versus a house with uneven gaps, mismatched panels, and a generally messy appearance. The first demonstrates a high level of skill and attention to detail, while the second suggests a lack of professionalism.
Closure
Choosing the right siding and installer is a significant investment, but with careful planning and the right information, you can transform your home’s exterior while safeguarding its structural integrity. By understanding the various siding materials, recognizing the hallmarks of a qualified professional, and carefully budgeting for the project, you can confidently embark on this home improvement journey. Remember to always prioritize quality workmanship and a comprehensive warranty for lasting peace of mind. Your beautifully finished home will be a testament to your informed decision-making.
