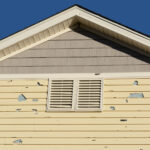
Can I install siding myself, or is it best to hire a professional contractor for a seamless finish and warranty? This question weighs heavily on many homeowners embarking on exterior renovations. The decision hinges on a careful assessment of your skills, budget, and the desired outcome. While DIY offers potential cost savings, professional installation guarantees quality, a comprehensive warranty, and avoids potentially costly mistakes. This guide explores both options, helping you make an informed choice that best suits your needs and circumstances.
We’ll delve into the intricacies of different siding materials, the tools required, and a step-by-step guide for DIY installation (if you choose that route). However, we will also highlight the significant benefits of hiring a professional, including their expertise in navigating building codes, material selection, and ensuring a long-lasting, problem-free finish. Ultimately, the goal is to empower you with the knowledge to confidently decide which path aligns with your project goals.
DIY Siding Installation Feasibility
Installing siding yourself is a viable option for many homeowners, offering potential cost savings and the satisfaction of a hands-on project. However, it requires significant time, effort, and a certain level of skill. The feasibility depends heavily on the type of siding chosen, the complexity of the project, and the homeowner’s DIY experience. Careful planning and preparation are crucial for a successful outcome.
Siding Material Suitability for DIY Installation
Various siding materials are available, each with varying degrees of DIY-friendliness. Vinyl siding, due to its lightweight nature and relatively simple installation process, is often considered the most suitable option for beginners. It’s readily available, comes in various styles and colors, and is relatively inexpensive. Fiber cement siding, while durable and aesthetically pleasing, is heavier and more challenging to handle and cut, making it less ideal for a first-time DIYer. Wood siding, while offering a classic look, requires more advanced carpentry skills and is susceptible to weather damage, necessitating regular maintenance. Metal siding, though durable and low-maintenance, can be difficult to work with due to its rigidity and potential for sharp edges. Choosing the right material significantly impacts the project’s feasibility.
Tools and Equipment for DIY Siding Installation
Successful DIY siding installation requires a range of tools and equipment. These include, but are not limited to: a measuring tape, level, chalk line, circular saw (with appropriate blades for the siding material), utility knife, hammer, nail gun (with appropriate nails), safety glasses, work gloves, scaffolding or ladder (for taller buildings), and possibly a power drill. The specific tools will vary depending on the siding material chosen and the complexity of the project. Renting specialized tools, such as a nail gun, can be a cost-effective alternative to purchasing them outright, especially for a one-time project. Ensuring all tools are in good working order before commencing work is essential for safety and efficiency.
Step-by-Step Guide for Vinyl Siding Installation
This guide outlines a simplified approach to vinyl siding installation. Always refer to the manufacturer’s instructions for specific details and recommendations.
1. Preparation: Measure and mark the area to be sided. Ensure proper ventilation and drainage are accounted for. Remove any existing siding or trim.
2. Installation of Starter Strip: Install the starter strip along the bottom of the wall, ensuring it is level.
3. Installing the First Course: Install the first course of siding, overlapping the starter strip and securing it with nails.
4. Subsequent Courses: Continue installing subsequent courses, overlapping each course by the manufacturer’s recommended amount. Ensure proper alignment and spacing.
5. J-Channel and Finishing: Use J-channel around windows and doors for a clean finish. Install corner trim and other necessary finishing pieces.
6. Inspection: Carefully inspect the entire installation for any gaps, misalignments, or damage.
Cost Comparison: DIY vs. Professional Siding Installation
The following table provides a general cost comparison. Actual costs can vary based on location, material choices, and project size.
| Cost Factor | DIY | Professional |
|---|---|---|
| Materials (Vinyl Siding) | $2,000 – $4,000 | $2,000 – $4,000 |
| Labor | $0 (Your Time) | $5,000 – $15,000 |
| Tools (Rental/Purchase) | $100 – $500 | Included in Labor Costs |
| Total Estimated Cost | $2,100 – $4,500 | $7,000 – $19,000 |
Professional Siding Installation Benefits
Opting for professional siding installation offers significant advantages over a DIY approach, primarily concerning the longevity, aesthetic appeal, and overall value of your home improvement project. Professionals possess the expertise and resources to ensure a superior outcome, minimizing potential risks and maximizing the return on your investment.
Professional contractors bring a wealth of knowledge and experience to the project, resulting in a higher-quality installation. This expertise encompasses several key areas that contribute to a successful and long-lasting siding job.
Contractor Expertise and Building Codes
Professional installers possess an in-depth understanding of local building codes and regulations. This ensures your siding installation complies with all necessary standards, avoiding potential legal issues and ensuring the structural integrity of your home. They are familiar with proper flashing techniques to prevent water damage, appropriate ventilation methods to avoid moisture buildup, and the correct fastening procedures to withstand various weather conditions. Ignoring these aspects during DIY installation can lead to costly repairs and structural problems down the line. For instance, improperly installed flashing can lead to water intrusion behind the siding, causing rot and mold, necessitating extensive and expensive repairs.
Material Selection and Application
Professional siding installers are well-versed in the selection and application of various siding materials. They can advise you on the most suitable options for your home’s style, budget, and climate. They understand the nuances of different materials, such as vinyl, fiber cement, and wood, and know how to handle each material properly to achieve optimal results. Incorrect material selection or improper installation can result in premature aging, warping, cracking, and other issues that significantly reduce the lifespan of your siding. A professional can identify and avoid such pitfalls. For example, they would know to account for expansion and contraction of vinyl siding in different temperatures to prevent buckling or gaps.
Avoiding Costly DIY Mistakes
DIY siding installation often leads to unforeseen problems that can be far more expensive to rectify than hiring a professional from the start. Common mistakes include improper nailing, leading to loose siding and damage during high winds; inadequate flashing, causing water damage and mold growth; and incorrect installation around windows and doors, resulting in leaks and drafts. These issues not only detract from the aesthetic appeal but can also cause significant structural damage, leading to costly repairs and potentially impacting the home’s value. A simple mistake like using the wrong type of nails can lead to siding failure within a few years, requiring complete or partial replacement.
Warranty Coverage Comparison
| Feature | DIY Installation | Professional Installation |
|---|---|---|
| Warranty Coverage | Limited or no warranty on materials; labor is not covered. | Comprehensive warranty covering both materials and labor, typically lasting several years. |
| Warranty Claims | Difficult or impossible to file claims due to lack of professional documentation. | Straightforward claims process with documentation provided by the contractor. |
| Liability | Homeowner is solely responsible for any issues or damages. | Contractor is often liable for defects in workmanship within the warranty period. |
| Repairs | Homeowner bears the full cost of repairs. | Contractor often covers repairs under the warranty. |
Assessing Your DIY Skills
Successfully installing siding requires a blend of practical skills and careful planning. Underestimating the complexity can lead to costly mistakes, wasted materials, and an unsatisfactory final product. This section helps you evaluate your abilities and determine if a DIY approach is feasible for your project.
Successful siding installation demands a range of skills, from basic carpentry and measuring to understanding building codes and working safely at heights. Prior experience with home improvement projects, particularly those involving exterior work, is highly beneficial. Familiarity with power tools, such as circular saws, miter saws, and nail guns, is essential, as is an understanding of how to use them safely and effectively. Precision in measuring and cutting is crucial to ensure a neat and professional-looking finish. Finally, a good understanding of building codes and local regulations related to siding installation is necessary to ensure compliance and avoid potential problems.
Siding Type and Difficulty
Different siding materials present varying levels of difficulty for installation. Vinyl siding, due to its lightweight nature and relatively simple installation process, is often considered the most beginner-friendly option. Its interlocking design simplifies installation and reduces the need for precise cuts. Fiber cement siding, while offering superior durability, is more demanding due to its weight and the need for specialized tools and techniques for cutting and fastening. Wood siding requires advanced carpentry skills and a high level of precision, making it unsuitable for beginners. Metal siding, such as aluminum or steel, presents its own challenges, demanding careful handling to avoid dents and scratches. The choice of siding material significantly impacts the project’s complexity and should be carefully considered based on your skill level.
Factors to Consider Before DIY Siding Installation
Before embarking on a DIY siding installation, a comprehensive checklist is essential to ensure a successful outcome. This involves assessing several critical factors. First, evaluate the condition of your home’s existing siding and underlying structure. Are there any underlying issues, such as rot or damage to the sheathing, that need addressing before installing new siding? Next, consider the size and complexity of your home’s exterior. A large or unusually shaped house will significantly increase the time and effort required. Climate conditions also play a crucial role. Extreme temperatures or inclement weather can hinder progress and potentially damage materials. Finally, securing the necessary permits and complying with local building codes is paramount. Ignoring these aspects can result in legal issues and compromise the structural integrity of your home.
Resources for Learning Siding Installation Techniques
Numerous resources are available to assist aspiring DIYers in learning proper siding installation techniques. Online tutorials, available on platforms like YouTube, offer step-by-step guides and visual demonstrations of the process. Many manufacturers also provide detailed installation instructions and videos specific to their products. These resources often cover various aspects, from material selection and preparation to proper installation techniques and troubleshooting common problems. Additionally, local home improvement stores frequently offer workshops and classes on various home improvement projects, including siding installation. These in-person sessions provide hands-on experience and the opportunity to ask questions from experienced professionals. Consulting with a professional contractor for initial advice, even if you intend to do the work yourself, can also prove invaluable.
Warranty Considerations
Choosing between DIY siding installation and hiring a professional significantly impacts the warranty protection you receive. Understanding warranty coverage is crucial for protecting your investment and avoiding costly repairs down the line. This section details typical warranty offerings, conditions that void warranties, and the claims process.
Manufacturers typically offer warranties on their siding products, covering defects in materials and workmanship for a specific period, often ranging from 10 to 50 years, depending on the material (e.g., vinyl, fiber cement, metal). However, these warranties are usually contingent upon proper installation. Installers also often provide their own warranties on their labor, typically covering a shorter period, perhaps 1-2 years, guaranteeing their work against defects. These warranties act as a safety net, but their effectiveness depends on adhering to specific terms and conditions.
Warranty Coverage and Voiding Conditions
Siding manufacturer warranties generally cover defects in the materials themselves, such as cracking, fading, or warping, under normal use and weather conditions. However, damage caused by improper installation, such as improperly fastened panels or inadequate flashing around windows and doors, typically voids the warranty. Similarly, damage from acts of God (e.g., hurricanes, tornadoes) may not be covered. Installer warranties usually cover defects in their workmanship, such as improper installation leading to leaks or premature failure of the siding. Neglecting proper maintenance, like failing to clean the siding regularly, could also impact warranty coverage. For instance, a warranty might not cover damage caused by algae growth if the homeowner hasn’t followed recommended cleaning procedures.
Warranty Claims and the Claims Process
Filing a warranty claim typically involves contacting either the manufacturer or the installer, depending on the nature of the problem. For example, if the siding itself is defective (e.g., a panel cracks due to a manufacturing flaw), you would contact the manufacturer. If the problem stems from improper installation (e.g., leaks due to poorly sealed seams), you would contact the installer. The claims process usually involves providing documentation, such as photos of the damage, purchase receipts, and installation contracts. The manufacturer or installer may then inspect the damage to determine the cause and whether the claim is valid. If approved, the warranty may cover repair or replacement of the defective materials or workmanship. For instance, if a manufacturer determines a batch of siding had a defect, they might replace the affected panels at no cost to the homeowner.
Questions to Ask Potential Contractors
Before hiring a contractor, it’s vital to clarify their warranty policies and installation practices. Asking the right questions can prevent future disputes.
- What is the length and scope of your labor warranty?
- What conditions would void your labor warranty?
- What is the process for filing a warranty claim?
- Do you carry liability insurance?
- What is your experience with installing the type of siding I’ve chosen?
- Can you provide references from previous clients?
- What is your company’s policy on addressing disputes?
- Will the manufacturer’s warranty be transferable if I sell my house?
- What are your procedures for addressing unforeseen issues during installation?
- What type of documentation will I receive upon completion of the project?
Visual Aids for Siding Installation
Visual aids are invaluable for understanding the nuances of siding installation. Detailed images and diagrams can clarify complex procedures, ensuring a professional-looking and long-lasting result. This section provides descriptions of visual aids that would greatly benefit a DIYer or professional alike.
Siding Installation Around Windows and Doors
Proper installation around windows and doors is crucial for preventing water damage. This requires careful flashing and sealing. An image showing the layered approach to flashing would be helpful. This image would depict the window or door frame, then a layer of flashing tape carefully applied to create a watertight seal, followed by the installation of J-channel or starter strip, ensuring the siding overlaps the flashing and creates a smooth transition. A second image would showcase the use of caulking to seal any gaps between the flashing, the siding, and the window/door frame, emphasizing the importance of a continuous seal to prevent water intrusion. A third image could demonstrate the proper way to cut and fit the siding pieces to neatly fit around the window or door frame, showing a precise and clean finish without gaps. The importance of using high-quality sealant, specifically designed for exterior applications and resistant to UV degradation and extreme temperatures, should be highlighted in the caption.
Cutting and Fitting Siding Pieces
Achieving a seamless finish requires precise cutting and fitting of siding pieces. One image should illustrate the proper use of measuring tools, such as a tape measure and speed square, to accurately determine the length and angle of cuts needed for corners, windows, and doors. Another image would show the various cutting techniques, including using a miter saw for precise angled cuts and a utility knife for smaller adjustments. A third image should highlight the process of fitting the pieces together, emphasizing the importance of tight seams and avoiding gaps. The image should show how to use a level to ensure the siding is installed straight and plumb, and how to use shims to adjust for uneven surfaces. Finally, an image showing the use of fasteners (nails or screws) to secure the siding without damaging the material would be beneficial. The caption should highlight the importance of using the correct type and size of fasteners for the specific siding material.
Ventilation Behind Siding
Proper ventilation is essential to prevent moisture buildup behind the siding, which can lead to mold, rot, and other damage. An image depicting the installation of ventilation baffles or vents behind the siding would be useful. This image would clearly show how these components create an air gap, allowing for air circulation and moisture escape. Another image would illustrate the proper spacing between the siding and the sheathing, showing how this space allows for ventilation. A third image could demonstrate the use of weep holes in the siding, allowing water to drain away from the wall cavity. The caption would emphasize the importance of using appropriate ventilation methods based on the climate and building design, explaining how proper ventilation extends the life of the building envelope and reduces the risk of costly repairs.
Last Word
Ultimately, the decision of whether to install siding yourself or hire a professional rests on a careful evaluation of your skills, time constraints, and budget. While DIY offers potential cost savings, the expertise and warranty provided by a professional contractor often outweigh the perceived financial advantages. Weighing the risks of improper installation against the peace of mind a professional offers is crucial. This comprehensive guide has provided you with the information necessary to make a well-informed decision, ensuring your siding project is both successful and enjoyable.
