How to properly prepare the surface of your home for siding installation is crucial for a long-lasting, aesthetically pleasing result. This process, often overlooked, significantly impacts the longevity and performance of your new siding. From assessing existing materials and addressing underlying issues to cleaning, repairing, and priming the surface, proper preparation ensures a secure and visually appealing final product. Understanding the nuances of surface preparation for various siding types—vinyl, wood, fiber cement, and more—is key to achieving professional-quality results.
This guide delves into the essential steps, offering practical advice and clear instructions for homeowners undertaking this critical pre-installation phase. We’ll cover everything from identifying and resolving structural issues to selecting the right cleaning agents and priming techniques for optimal adhesion. By following these guidelines, you can confidently prepare your home’s exterior for a successful siding installation, ensuring a beautiful and durable outcome for years to come.
Assessing the Existing Surface
Proper preparation is paramount for a successful siding installation. A thorough assessment of your home’s existing surface is the crucial first step, ensuring a long-lasting and aesthetically pleasing result. This involves identifying the type of siding, evaluating its condition, and preparing the underlying structure for the new siding.
Existing Siding Materials and Their Impact on Preparation
Different siding materials require different preparation methods. Wood siding, for instance, may require more extensive repair and treatment for rot or insect damage than vinyl siding. Fiber cement siding, while durable, can be brittle and prone to cracking, necessitating careful inspection and repair before new siding installation. Metal siding, though generally durable, may require cleaning and addressing any rust or corrosion. Understanding the characteristics of your existing siding is key to planning the appropriate preparation strategy.
Identifying and Addressing Rot, Damage, or Insect Infestation
Careful inspection is necessary to identify any rot, damage, or insect infestation. Look for signs of discoloration, soft spots, or crumbling wood. Check for evidence of insect activity, such as holes, sawdust, or insect droppings. Rotted or damaged areas must be completely removed and replaced with new, treated lumber. For insect infestations, professional pest control treatment may be necessary before proceeding with siding removal and replacement. This ensures the underlying structure is sound and free from further deterioration.
Removing Old Siding: Safety Precautions and Disposal Methods
Removing old siding requires caution. Always wear appropriate safety gear, including safety glasses, gloves, and a dust mask. Use appropriate tools for the type of siding being removed, avoiding damage to the underlying sheathing. For example, a pry bar can be used carefully to remove wood siding, while a utility knife might be sufficient for vinyl siding. Dispose of old siding responsibly according to local regulations. Many municipalities offer recycling programs for certain siding materials, while others may require disposal at a landfill.
Evaluating the Structural Integrity of the Underlying Wall Sheathing
Before installing new siding, it’s vital to assess the condition of the underlying wall sheathing. Check for any signs of damage, such as rot, water damage, or insect infestation. Ensure that the sheathing is securely fastened and properly aligned. Replace any damaged or deteriorated sheathing. Inspect for proper spacing and fastening of the sheathing to the wall studs. Loose or improperly installed sheathing can lead to problems with the new siding. A checklist should include confirming the sheathing is properly fastened, checking for any water damage or rot, ensuring there is no insect infestation, and verifying that the sheathing is properly aligned.
Surface Preparation Methods for Different Siding Types
The preparation methods vary depending on the type of siding being installed. The following table outlines some common approaches:
| Siding Type | Surface Cleaning Method | Repair Method | Protective Coating |
|---|---|---|---|
| Vinyl | Pressure washing (low pressure) | Caulk and patching compound | None typically needed |
| Wood | Scrubbing with a stiff brush and detergent | Wood filler, replacement boards | Primer and wood sealant |
| Fiber Cement | Pressure washing (moderate pressure) | Epoxy filler, patching compound | Primer and sealant |
| Metal | Wire brushing, degreasing | Rust removal, patching | Rust-inhibiting primer |
Cleaning and Repairing the Surface
Preparing your home’s exterior for new siding involves more than just assessing the existing surface. A thorough cleaning and repair process is crucial for ensuring a long-lasting and aesthetically pleasing final result. Neglecting this step can lead to problems down the line, including premature siding failure and costly repairs. This section details the necessary steps to properly prepare your home’s surface for siding installation.
Surface Cleaning Methods
Effective cleaning removes dirt, mildew, loose paint, and other debris that could interfere with siding adhesion. The cleaning method will vary depending on the type of surface material. For wood surfaces, a pressure washer with a low-pressure nozzle can be used, followed by a scrub with a solution of mild detergent and water. Brick and stucco surfaces may require a more robust cleaning approach, potentially involving a stronger cleaning solution or a stiff brush. Always test any cleaning solution in an inconspicuous area first to ensure it doesn’t damage the surface. For stubborn mildew, a bleach solution (mixed according to manufacturer instructions) can be effective, but appropriate safety precautions, such as wearing gloves and eye protection, must be followed.
Damaged Sheathing Repair Techniques
Damaged sheathing must be addressed before siding installation. This could involve patching, replacing, or reinforcing sections of damaged material. Patching smaller holes or cracks can be accomplished using exterior-grade wood filler or patching compound, ensuring it’s properly applied and allowed to dry completely. Larger areas of damaged sheathing may require complete replacement with new, appropriately sized pieces of exterior-grade plywood or OSB. Reinforcing weakened areas can be achieved by adding additional sheathing layers or using metal straps for extra support, especially in areas prone to stress. All repairs must be securely fastened and level with the surrounding surface.
Caulking and Sealing
Caulking and sealing gaps and cracks is vital for preventing moisture intrusion behind the new siding. This step protects your home’s structure from water damage and helps maintain its energy efficiency. Use a high-quality exterior-grade caulk, ensuring complete coverage of all gaps, cracks, and joints. Pay particular attention to areas around windows, doors, and other penetrations in the wall. Choose a caulk that is compatible with the existing materials and that is paintable, if necessary.
Priming Surfaces
Priming the surface before siding installation improves adhesion and provides a uniform base for the siding. The choice of primer will depend on the surface material. Oil-based primers are often used for wood, providing excellent penetration and adhesion. For brick and stucco, an acrylic-based primer is typically preferred. Apply the primer evenly according to the manufacturer’s instructions, ensuring complete coverage. Allow the primer to dry completely before proceeding with siding installation.
Repair Material Selection Flowchart
The following flowchart illustrates the decision-making process for choosing appropriate repair materials:
[Imagine a flowchart here. The flowchart would start with a decision point: “Is the damage minor (small cracks, holes)?”. If yes, it branches to “Use wood filler or patching compound”. If no, it branches to “Is the damage extensive (large holes, rot)?”. If yes, it branches to “Replace damaged sheathing”. If no, it branches to “Is the sheathing weakened but intact?”. If yes, it branches to “Reinforce with additional sheathing or metal straps”. The flowchart ends with “Proceed to priming and siding installation”.]
Preparing for Installation
With the surface properly cleaned and repaired, the next step is to prepare for siding installation. This involves gathering the necessary tools and materials, ensuring a level and plumb surface, and installing crucial protective elements like flashing and water barriers. Proper preparation significantly impacts the longevity and aesthetic appeal of your new siding.
Necessary Tools and Materials
The tools and materials required will vary depending on the type of siding being installed, but a comprehensive list ensures a smooth process. Essential tools include a measuring tape, level, chalk line, circular saw (or appropriate cutting tool for your siding), hammer, nail gun (optional but highly recommended for efficiency), safety glasses, work gloves, and a utility knife. Materials will include the siding itself, starter strips, flashing (various types depending on the application), water-resistant barrier (house wrap or similar), appropriate fasteners (nails or screws), and sealant. Consider adding a caulking gun and sealant for additional weatherproofing. Always check manufacturer instructions for specific requirements for your chosen siding.
Ensuring a Level and Plumb Surface
A level and plumb surface is paramount for proper siding installation. Uneven surfaces can lead to gaps, compromised weather protection, and an unsightly finished product. Before beginning installation, use a level and plumb bob to check the walls for any significant deviations. Minor imperfections can often be addressed with shims, but significant deviations may require more extensive repairs. Remember, a consistent surface is key to ensuring the siding sits flush and straight.
Installing Flashing and Water Barriers
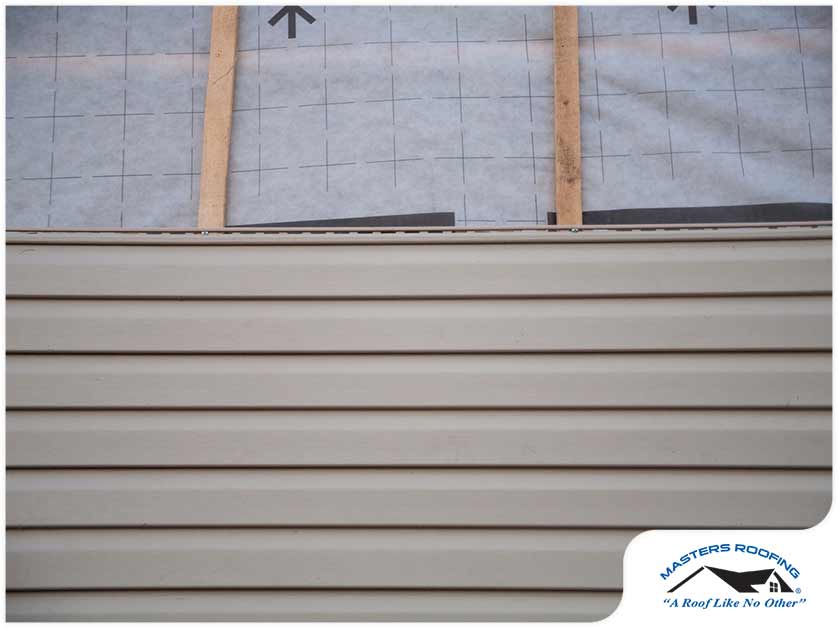
Flashing and water barriers are crucial for preventing moisture damage. Flashing, typically made of metal, is installed around windows, doors, and other areas where the siding intersects with other building components. It acts as a barrier to direct water away from these vulnerable points. Water barriers, such as house wrap, are installed over the sheathing to create a continuous layer of protection against moisture penetration. Proper overlap and sealing of the water barrier are crucial. For example, a common mistake is inadequate overlap, leaving gaps that can allow water to penetrate the wall system.
Securing Starter Strips and Other Components
Starter strips provide a straight and consistent base for the first row of siding. They are typically nailed or screwed directly to the sheathing, ensuring they are perfectly level and plumb. Other components, such as corner trim and J-channels, are installed according to the manufacturer’s instructions, providing a neat and professional finish. Accurate measurement and placement are essential to avoid gaps or misalignments. Using a chalk line can help ensure straight lines for the installation of these components.
Safety Precautions
Safety should always be the top priority. Wear safety glasses and work gloves at all times to protect against flying debris and sharp edges. Use appropriate personal protective equipment (PPE) as needed. When using power tools, always follow the manufacturer’s instructions and ensure the area is clear of obstructions. Work from stable platforms and use fall protection if working at heights. Be mindful of overhead power lines and other potential hazards. Proper planning and adherence to safety guidelines will contribute to a safe and successful installation.
Specific Surface Types and Preparations
Preparing the surface for siding installation varies significantly depending on the existing material. Understanding these differences is crucial for ensuring a long-lasting, aesthetically pleasing, and structurally sound installation. Ignoring these variations can lead to costly repairs and compromised performance down the line.
Different materials present unique challenges and require specific preparation techniques. Wood, vinyl, brick, and stucco all demand different approaches to cleaning, repair, and priming before siding installation can begin. Furthermore, the climate and the presence of existing insulation also impact the preparation process.
Surface Preparation for Various Materials
Wood, vinyl, brick, and stucco homes each require a distinct preparation approach. Wood surfaces often need repair of rot or insect damage, followed by thorough cleaning and priming to ensure proper adhesion of the new siding. Vinyl siding, if already present, might need cleaning and assessment for damage before the new siding can be installed. Brick requires careful cleaning to remove loose mortar, dirt, and efflorescence (salt deposits). Stucco surfaces necessitate checking for cracks, loose areas, and ensuring a sound, stable base before proceeding. Failure to adequately address these material-specific issues can compromise the longevity and quality of the siding installation.
Addressing Complex Architectural Details
Homes with intricate architectural features, such as dormers, bay windows, and complex trim work, present unique challenges. These areas often require more meticulous cleaning and repair work. Careful masking and protection of these delicate details are necessary to prevent damage during the siding installation process. For example, intricate molding might require careful hand-cleaning to avoid damage, and extra attention should be paid to ensure proper sealing around windows and other openings to prevent water infiltration.
Climate and Weather Considerations
The climate and weather conditions significantly impact surface preparation. In hot, dry climates, proper hydration of the substrate (the surface being sided) might be necessary to prevent cracking and ensure good adhesion. In humid or wet climates, allowing sufficient drying time is essential to prevent mold and mildew growth. Extreme temperatures can affect the drying time of primers and sealants, requiring adjustments to the preparation schedule. For example, in extremely cold climates, the use of frost-resistant primers and sealants might be required, and work may need to be paused until temperatures are suitable. Conversely, extreme heat may require working during cooler parts of the day.
Preparing Surfaces with Existing Insulation
When preparing a surface with existing insulation, it’s crucial to ensure its integrity and compatibility with the new siding. Inspect the insulation for any damage or deterioration. If the insulation is damaged or inadequate, it may need to be repaired or replaced before proceeding with the siding installation. The type of insulation also matters. For example, foam insulation may require specific primers to ensure proper adhesion of the siding. In cases where the existing insulation is not compatible with the new siding, it may be necessary to remove the old insulation and install a new, compatible type.
Common Mistakes to Avoid
Preparing the surface for siding is a critical step. Overlooking crucial aspects can lead to significant problems. It’s essential to avoid the following common mistakes:
The following list outlines common mistakes that can compromise the longevity and quality of a siding installation. Avoiding these issues will lead to a more successful and lasting project.
- Ignoring existing damage: Failing to adequately address cracks, rot, or other damage in the existing surface.
- Insufficient cleaning: Not thoroughly cleaning the surface to remove dirt, debris, and loose materials.
- Improper priming: Using the wrong type of primer or failing to apply it correctly.
- Ignoring weather conditions: Proceeding with installation in unsuitable weather conditions (e.g., extreme heat or cold, rain).
- Neglecting complex details: Not paying sufficient attention to complex architectural details, leading to gaps or damage.
- Rushing the process: Not allowing adequate drying time between preparation steps.
Illustrative Examples
Understanding the visual aspects of a properly and improperly prepared surface is crucial for successful siding installation. The following examples illustrate key differences and highlight potential pitfalls to avoid.
A properly prepared surface presents a uniform appearance, ready to receive the new siding.
Properly Prepared Surface
A properly prepared surface for siding installation exhibits a consistent color and texture. Imagine a freshly painted wall, but instead of a smooth finish, it might have a slightly textured surface depending on the underlying material. For instance, if the substrate is wood, the texture might be slightly rough but even, with no protruding nails, loose splinters, or significant gaps. The color should be uniform and consistent, reflecting the primer or sealant applied. There should be no significant variations in shade or patches of discoloration. The overall impression is one of cleanliness and readiness for the new siding. The surface should be completely dry and free of any dust, debris, or loose materials.
Improperly Prepared Surface
In contrast, an improperly prepared surface reveals numerous potential problems. Imagine a wall with patches of peeling paint, exposed wood showing significant weathering and discoloration, or large gaps between the existing sheathing. The surface might exhibit a varied texture, with some areas smooth and others rough, uneven, or even damaged. The color will likely be inconsistent, with areas of different shades, or patches of discoloration and staining. Loose debris, such as old caulk or loose paint chips, could be present. Significant gaps between the existing sheathing or underlying structure would be immediately visible. Such inconsistencies would negatively impact the adhesion of the siding and could lead to future problems such as moisture intrusion, insect infestation, and even structural damage.
Sealants and Primers on Various Surfaces
The visual appearance of properly applied sealants and primers varies depending on the substrate. On wood, a sealant might leave a slightly darker, more saturated appearance, enhancing the wood grain and providing a protective barrier. A primer on a concrete or masonry surface, on the other hand, might appear as a thin, even coat, subtly altering the color of the surface to provide a better base for the siding. In both cases, a properly applied sealant or primer should be even and consistent, without streaks, runs, or visible brush marks. An improperly applied sealant or primer might exhibit uneven coverage, with streaks, patches, or areas where the material has pooled or run down the surface. It may also appear patchy or inconsistent in color.
Properly and Poorly Installed Flashing
Properly installed flashing is largely invisible, seamlessly integrated with the underlying structure. It will be neatly tucked and sealed to prevent water penetration. Imagine a thin, metallic strip neatly fitted around windows and doors, completely hidden beneath the siding. Poorly installed flashing, however, is easily visible. It may be wrinkled, improperly sealed, or sticking out from under the siding. Water penetration is highly likely at such points, potentially causing significant damage to the underlying structure. The flashing might be exposed and showing signs of rust or corrosion.
Securing a Starter Strip
A properly secured starter strip is crucial for a straight and level siding installation. Visualize a perfectly straight, level strip, precisely aligned at the bottom of the wall, serving as a foundation for the rest of the siding. It is firmly attached to the wall with evenly spaced nails, hidden beneath the first row of siding. An improperly secured starter strip, in contrast, might be crooked, uneven, or loosely attached, leading to misalignment of the subsequent siding rows. It could be visible, or the nails may be poorly placed and creating gaps. The unevenness would be immediately noticeable, compromising the aesthetic appeal and structural integrity of the entire siding installation.
Final Summary
Preparing your home’s surface for siding installation is more than just a preliminary step; it’s the foundation for a successful project. By meticulously assessing your existing surface, addressing any damage, and ensuring proper cleaning and priming, you’ll significantly enhance the longevity and aesthetic appeal of your new siding. Remember, taking the time for thorough preparation will ultimately save you time, money, and potential headaches down the line. A well-prepared surface guarantees a superior installation, resulting in a beautiful and durable exterior that enhances your home’s curb appeal and protects it from the elements for years to come.
