How to identify and address issues with siding that is not properly installed is crucial for maintaining your home’s structural integrity and energy efficiency. Improperly installed siding can lead to a cascade of problems, from unsightly gaps and uneven seams to significant water damage, rot, and even structural instability. This guide will equip you with the knowledge to identify these issues, assess the extent of the damage, and implement effective repair strategies. We will explore various siding types, common installation flaws, and preventative measures to ensure your home’s exterior remains protected and aesthetically pleasing for years to come.
Understanding the nuances of siding installation is key to preventing costly repairs and maintaining the value of your property. We’ll delve into practical techniques for inspecting your siding, identifying the root causes of problems, and choosing the appropriate repair methods. Whether you’re dealing with minor cosmetic issues or extensive damage, this comprehensive guide will provide the information you need to make informed decisions and protect your investment.
Identifying Improper Siding Installation
Proper siding installation is crucial for both the aesthetic appeal and the structural integrity of your home. Neglecting proper installation techniques can lead to costly repairs down the line, impacting energy efficiency and potentially causing significant damage. Recognizing the signs of improper installation is the first step towards addressing these issues effectively.
Common Signs of Improper Siding Installation
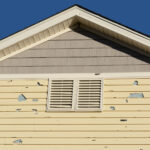
Several visual cues can indicate problems with your siding installation. These range from subtle imperfections to more obvious signs of damage. Careful inspection of your siding is essential to identify these issues early. Gaps between siding panels, uneven seams, and visible damage to the siding itself are all key indicators of improper installation. Furthermore, look for signs of water damage, such as discoloration or rot around seams or near the foundation. These are strong indicators of leaks resulting from poorly installed siding.
Examples of Improper Installation by Siding Type
Different siding materials present unique installation challenges. Understanding these challenges and their visual manifestations is crucial for accurate diagnosis. The following table outlines common flaws associated with various siding types:
| Type of Siding | Common Flaw | Visual Description | Impact on Home |
|---|---|---|---|
| Vinyl Siding | Improper Overlap | Visible gaps between siding panels, allowing water penetration. Panels may appear wavy or uneven. | Water damage to underlying sheathing, mold growth, and reduced energy efficiency. |
| Wood Siding | Insufficient Spacing | Siding panels are installed too tightly, preventing proper expansion and contraction with temperature changes. This can lead to buckling or warping. | Siding damage, potential cracking, and compromised structural integrity. |
| Fiber Cement Siding | Damaged Edges | Chipped or broken edges of panels, often resulting from improper handling during installation. | Water intrusion, reduced aesthetic appeal, and potential for further damage. |
| Metal Siding | Improper Flashing | Missing or improperly installed flashing around windows and doors, leading to water leakage. Visible rust or corrosion may be present. | Water damage to the underlying structure, potential for significant structural damage, and costly repairs. |
Impact of Improper Installation on Home Energy Efficiency and Structural Integrity
Improperly installed siding directly impacts a home’s energy efficiency and structural soundness. Gaps and inconsistencies in the siding allow for air infiltration, leading to increased heating and cooling costs. This can translate to significantly higher energy bills throughout the year. Furthermore, water intrusion due to poor installation can lead to rot, mold growth, and damage to the underlying sheathing and structural components of the house. In severe cases, this can compromise the structural integrity of the home, necessitating extensive and costly repairs. For example, a home with improperly installed vinyl siding might experience a 20-30% increase in energy costs compared to a home with properly installed siding, depending on climate and the extent of the gaps. Similarly, water damage caused by inadequate flashing around windows can lead to extensive rot in wall studs and require significant structural repairs, potentially costing thousands of dollars.
Assessing the Extent of Damage
Once you’ve identified improper siding installation, the next crucial step is to thoroughly assess the extent of the damage. This involves inspecting for water damage, rot, and insect infestation, all of which can significantly compromise the structural integrity of your home and lead to costly repairs. Understanding the cause of the damage—whether it stems from poor workmanship, faulty materials, or weather-related issues—is equally important for effective remediation.
Determining the source of the siding problems will guide your repair strategy. For example, water damage resulting from gaps in the installation requires a different approach than damage caused by using substandard materials. A comprehensive inspection is essential for accurate diagnosis and effective planning.
Water Damage Inspection
Water intrusion is a common consequence of improper siding installation. Inspecting for water damage requires a systematic approach. Begin by checking areas prone to water accumulation, such as the bottom edges of the siding, around windows and doors, and at seams and joints. Look for discoloration, staining, blistering paint, or swelling of the siding material. Use a moisture meter to measure the moisture content of the siding and underlying sheathing. High moisture readings indicate significant water damage that may extend beyond the surface. If you find water damage, carefully examine the area behind the siding for signs of rot or mold.
Rot and Insect Infestation Assessment
Rot and insect infestation are often linked to water damage. Soft, spongy, or crumbling wood indicates rot. Inspect for signs of insect activity, such as holes, tunnels, or frass (insect droppings). Pay close attention to areas around fasteners and where siding overlaps. A pry bar can help gently lift suspect areas of siding to examine the underlying sheathing and framing for damage. Remember to take precautions to avoid further damage during the inspection.
Identifying the Root Cause
Determining the root cause of the siding issues is vital for effective repair. Poor workmanship may manifest as gaps between siding panels, improper flashing installation, or incorrect nailing patterns. Material defects might include cracks, warping, or delamination of the siding. Weather damage can be identified by patterns of damage consistent with wind, hail, or sun exposure. Document your findings with photographs and detailed notes. Consider consulting with a building inspector or experienced contractor to get a professional opinion on the cause and extent of the damage.
Step-by-Step Siding Inspection Procedure
A systematic approach ensures a thorough inspection. This procedure involves using a combination of visual inspection and specialized tools.
- Visual Inspection: Begin with a thorough visual inspection of the entire siding, paying close attention to areas mentioned previously.
- Moisture Meter: Use a moisture meter to check the moisture content of the siding and sheathing in suspect areas.
- Pry Bar: Carefully use a pry bar to gently lift and inspect areas suspected of having underlying damage. This allows access to check for rot or insect infestation.
- Magnifying Glass: A magnifying glass can help identify small cracks, insect holes, or other subtle signs of damage.
- Photography and Documentation: Take detailed photographs and make thorough notes of all findings, including locations, types of damage, and suspected causes.
This detailed inspection will provide a comprehensive understanding of the extent of damage and inform the necessary repair strategies. Remember safety first, wear appropriate protective gear, and consult professionals when needed.
Repairing Improperly Installed Siding
Repairing improperly installed siding involves a multifaceted approach dependent on the type of siding, the extent of the damage, and the homeowner’s skill level. Minor issues may be manageable with DIY solutions, while extensive damage often necessitates professional intervention. Careful attention to detail during repair is crucial to prevent future water damage and maintain the structural integrity of the home.
Siding Repair Techniques
Various repair techniques exist, tailored to the specific siding material and the nature of the damage. Patching is suitable for minor damage, such as small holes or cracks. Replacing individual panels addresses more significant damage, while full-section replacement is necessary for extensive or widespread issues. For example, a single damaged vinyl siding panel can be replaced, whereas extensive water damage might require replacing a whole section of clapboard siding. The choice of repair method directly impacts the overall cost and time commitment.
Flashing and Sealant Installation
Proper installation of flashing and sealants is paramount in preventing water ingress. Flashing, typically made of metal, acts as a barrier against water penetration around windows, doors, and other penetrations in the siding. Sealants, such as caulking or silicone, create a waterproof seal between siding panels and around flashing. For instance, flashing should be installed under the bottom edge of overlapping siding panels to direct water away from the wall. Sealants should be applied generously and smoothly, ensuring complete coverage of joints and gaps. Failure to properly install flashing and sealants can lead to water damage, mold growth, and structural problems.
Siding Repair Material Comparison
The choice of repair material significantly impacts the project’s cost, durability, and aesthetic outcome. Several options exist, each with its own advantages and disadvantages.
- Vinyl Siding:
- Cost: Relatively inexpensive.
- Durability: Moderate; susceptible to cracking and fading over time.
- Aesthetic Appeal: Wide range of colors and styles available.
- Fiber Cement Siding:
- Cost: More expensive than vinyl but less than wood.
- Durability: Highly durable; resistant to fire, rot, and insects.
- Aesthetic Appeal: Can mimic the look of wood or other materials.
- Wood Siding:
- Cost: Expensive, especially for high-quality woods.
- Durability: Highly durable if properly maintained; susceptible to rot and insect damage if not.
- Aesthetic Appeal: Classic and timeless look; requires regular maintenance.
- Metal Siding:
- Cost: Moderately priced; varies greatly depending on the type of metal.
- Durability: Extremely durable; resistant to fire, rot, and insects.
- Aesthetic Appeal: Modern and sleek; available in various colors and finishes.
Preventing Future Siding Issues
Proactive measures during new construction or remodeling significantly reduce the likelihood of future siding problems. Careful planning, diligent contractor selection, and a well-defined contract are crucial for ensuring a long-lasting, aesthetically pleasing, and structurally sound siding installation. Neglecting these preventative steps can lead to costly repairs and significant inconvenience down the line.
Understanding the key aspects of proper installation and the importance of a robust contract are vital for homeowners. By taking a proactive approach, you can protect your investment and avoid the headaches associated with improperly installed siding.
Elements of a Comprehensive Siding Installation Contract
A detailed and comprehensive contract serves as a legal agreement outlining the scope of work, payment terms, and responsibilities of both the homeowner and the contractor. This document protects both parties and minimizes the potential for disputes. A well-written contract should include specifics about materials, labor, warranties, and a clear timeline for completion. Ambiguity in the contract can lead to misunderstandings and conflicts later on. For example, the contract should clearly specify the type and brand of siding materials to be used, ensuring that it matches the homeowner’s expectations. It should also outline the process for addressing any unforeseen issues that might arise during the installation. Furthermore, a detailed payment schedule, tied to specific milestones in the project, protects the homeowner from paying in full before the work is completed to the agreed-upon standards. Finally, the contract should clearly define the warranty offered by the contractor and the procedures for filing a claim under that warranty.
Selecting a Qualified Siding Contractor
Choosing a reputable and qualified siding contractor is paramount to preventing future issues. Thorough research and due diligence are essential steps in this process. Start by checking online reviews and ratings from previous clients. Look for contractors with a proven track record of successful projects and positive feedback. Request references from potential contractors and contact those references to inquire about their experiences. Verify the contractor’s licensing and insurance, ensuring they are legally permitted to operate in your area and have adequate insurance coverage to protect you in case of accidents or damage during the installation process. Finally, don’t hesitate to ask detailed questions about their experience with different siding materials and installation techniques. A qualified contractor will be happy to answer your questions and provide you with the information you need to make an informed decision. For instance, inquire about their experience with specific siding materials you’re considering, such as vinyl, fiber cement, or wood. Ask about their approach to moisture management and ventilation, critical elements in preventing siding damage. A contractor’s willingness to provide detailed answers and documentation showcases their professionalism and commitment to quality workmanship.
Preventative Measures During Construction or Remodeling
Careful preparation before the installation begins is crucial. This includes ensuring proper preparation of the underlying wall structure, addressing any existing moisture issues, and selecting appropriate siding materials for the climate and building style. For instance, ensuring the wall sheathing is properly installed and free from damage before siding installation is a critical step. Any existing moisture problems, such as water damage or mold, must be addressed before installing new siding to prevent further damage. The selection of siding material should be tailored to the local climate. In areas with high humidity, materials with good moisture resistance are crucial, while in areas prone to extreme temperature fluctuations, materials with good thermal performance are essential. Adequate ventilation behind the siding is also vital to prevent moisture buildup. This often involves the use of proper flashing and drainage systems to redirect water away from the building. Regular inspections during and after installation help identify and rectify any problems early on, preventing them from escalating into more significant issues. For example, regular checks during installation can reveal issues like improperly spaced siding or gaps in flashing, allowing for timely corrections. These steps, while seemingly minor, can significantly impact the longevity and performance of the siding.
Illustrative Examples
To further solidify understanding of improper siding installation, let’s examine specific scenarios involving vinyl and wood siding. These examples highlight common mistakes and their resulting problems. Visualizing these issues will aid in recognizing similar problems in your own assessments.
Improper siding installation can lead to significant problems, ranging from cosmetic flaws to serious structural damage. Understanding these issues is crucial for effective repair and prevention.
Improperly Installed Vinyl Siding
Imagine a section of vinyl siding on a home’s south-facing wall. The installer, in a rush to finish the job, failed to properly overlap the siding panels. Instead of a consistent 1-inch overlap, many panels show only a half-inch or less. In some areas, gaps are completely visible between the panels, exposing the underlying sheathing. The consequences are readily apparent: the aesthetic appeal is severely diminished; water can easily penetrate these gaps, leading to moisture damage to the house’s framing and insulation. Further, the wind can whistle through these openings, reducing the home’s energy efficiency. In colder climates, ice dams could form, causing further damage. The image would show a close-up view of the inconsistent overlaps, with some gaps large enough to insert a finger. The uneven appearance of the siding would be clear, highlighting the lack of professional installation.
Improperly Installed Wood Siding
Consider a home with horizontal wood siding. The installer did not adequately space the siding boards, leaving gaps of varying widths between them. In addition, several boards were nailed too close to the edges, causing them to split and warp. Some boards were installed without proper flashing, leading to water penetration behind the siding. The consequences of this improper installation are multifaceted. The gaps allow water intrusion, leading to rot and decay of the wood siding and underlying sheathing. The splitting and warping detract from the home’s aesthetic value. The lack of flashing allows water to seep behind the siding, causing damage to the wall structure and potentially leading to mold growth. The image would show close-up views of the gaps between the boards, the split and warped boards, and the lack of proper flashing at the seams. The overall appearance would be one of disrepair and neglect.
Epilogue
Addressing improperly installed siding requires a multifaceted approach encompassing careful inspection, accurate damage assessment, and the selection of appropriate repair techniques. By understanding the common flaws associated with different siding types and employing preventative measures, homeowners can significantly reduce the risk of future problems. Remember, proactive maintenance and the selection of qualified contractors are vital for ensuring the long-term health and beauty of your home’s exterior. Taking the time to understand these principles can save you significant time, money, and frustration in the long run.

