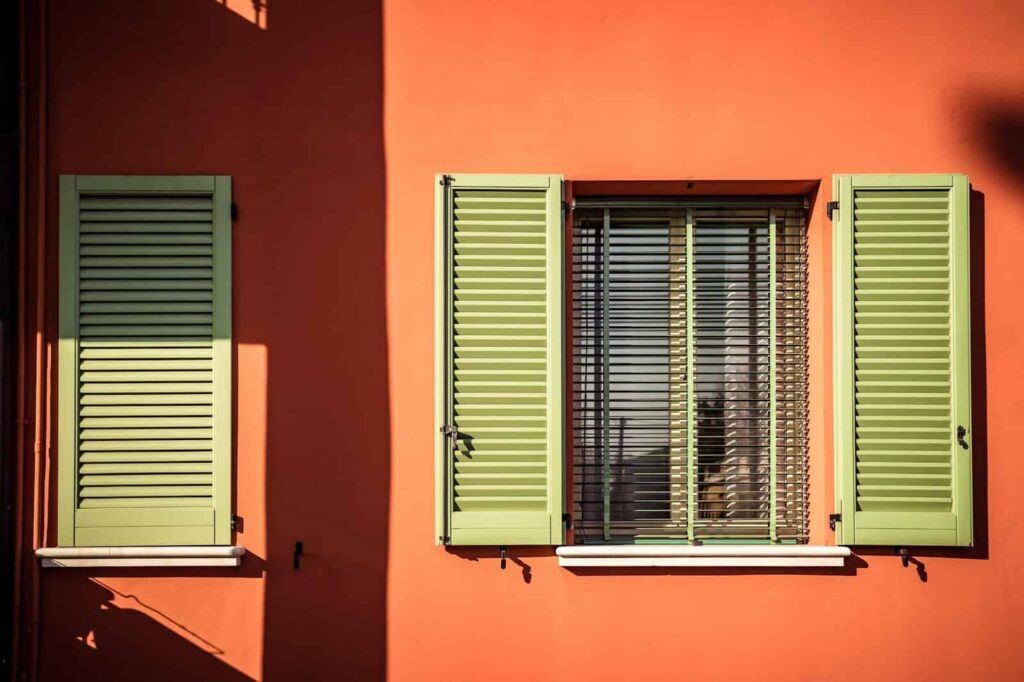
How to Choose the Right Exterior Shutters for Your Home is more than just picking a pretty design; it’s about enhancing your home’s curb appeal, improving energy efficiency, and adding lasting value. This guide will walk you through the process, from understanding your home’s architectural style to selecting the right material, size, and style to perfectly complement your property. We’ll explore various options, discuss practical considerations, and help you make informed decisions to achieve the perfect look and functionality.
Choosing exterior shutters involves careful consideration of several factors. Architectural style, material durability, size accuracy, and desired aesthetic all play crucial roles in the final result. Understanding these elements ensures that your shutters not only look fantastic but also provide optimal performance and longevity. This guide aims to equip you with the knowledge necessary to navigate this decision-making process with confidence.
Understanding Your Home’s Style
Choosing the right exterior shutters involves careful consideration of your home’s architectural style. The style of your house dictates the appropriate shutter size, shape, and material, ultimately impacting the overall curb appeal. A mismatch can detract from your home’s aesthetic, while a well-chosen set of shutters can enhance its beauty and character.
Selecting shutters that complement your home’s architecture is crucial for achieving a cohesive and visually appealing exterior. Different architectural styles lend themselves to different shutter types and designs. Understanding these nuances will guide you towards making the best choice for your property.
Shutter Styles and Architectural Harmony
The following table illustrates how various shutter styles complement different architectural styles. Consider these examples as a starting point for your own research and selection process. Remember that personal preference also plays a significant role.
| Style | Shutter Type | Material | Example Image Description |
|---|---|---|---|
| Victorian | Louvered, with multiple panels and decorative details | Wood (painted) | Image depicting richly detailed, dark-green louvered shutters with multiple panels, adorning a white Victorian home with intricate trim. The shutters are slightly arched at the top, adding to their ornate appearance. |
| Ranch | Board and batten, simple and clean lines | Wood or vinyl | Image showing a ranch-style home with simple, straight board and batten shutters in a neutral beige color that blends seamlessly with the home’s siding. The shutters are relatively narrow and evenly spaced. |
| Colonial | Raised panel, symmetrical and traditional | Wood or fiberglass | Image of a colonial-style home featuring raised panel shutters, painted a classic black, adding a sharp contrast against the pale yellow siding. The shutters are wide and proportionally balanced with the windows. |
| Craftsman | Board and batten or simple louvered, emphasizing natural materials | Wood (stained or natural finish) | Image showcasing a Craftsman bungalow with stained wood board and batten shutters that complement the natural wood elements of the house’s porch and trim. The shutters have a simple, unadorned design. |
Shutter Color and Siding Considerations
Shutter color significantly impacts the overall aesthetic. The color you choose should complement, not clash with, your home’s siding and trim. For instance, a dark shutter color against a light-colored siding can create a striking contrast, while lighter shutters can blend more seamlessly.
Consider the following:
* Light siding: Offers versatility; both light and dark shutters work well. Dark shutters create a dramatic effect, while light shutters provide a more subtle look.
* Dark siding: Lighter-colored shutters often provide a more balanced look, preventing the home from appearing too heavy or dark. However, using a slightly darker shutter can add depth and sophistication.
* Brick homes: Consider the brick color and choose shutters that complement its tones. Neutral colors, or shades that echo the brick’s hues, generally work best.
* Stone homes: Similar to brick, choose shutter colors that harmonize with the stone’s natural tones. Earth tones and muted colors often create a cohesive look.
Choosing the Right Shutter Material
Selecting the right shutter material is crucial for both the aesthetic appeal and the longevity of your home’s exterior. The material you choose will significantly impact the overall look, maintenance needs, and the lifespan of your shutters. Consider your budget, climate, and desired level of upkeep when making your decision.
Shutter Material Comparison: Wood, Vinyl, and Composite
Wood, vinyl, and composite materials each offer distinct advantages and disadvantages. Understanding these differences will help you make an informed choice that best suits your home and lifestyle. The following comparison focuses on durability, maintenance, and cost.
Wood Shutters
Wood shutters offer a classic, timeless appeal. Their natural beauty and versatility allow for customization through paint or stain. However, they require more maintenance than other materials. Exposure to the elements can lead to warping, rotting, and insect infestation if not properly treated and maintained.
- Pros: Natural beauty, customizable, can be stained or painted various colors, adds significant curb appeal.
- Cons: High maintenance, susceptible to warping, rotting, and insect damage, relatively high cost, requires regular painting or sealing.
Vinyl Shutters
Vinyl shutters are a popular choice due to their low maintenance and affordability. They are resistant to moisture, insects, and rot, making them ideal for harsh weather conditions. However, they may not offer the same level of aesthetic appeal as wood, and can be prone to cracking or fading under intense sunlight.
- Pros: Low maintenance, resistant to moisture, insects, and rot, relatively inexpensive, durable.
- Cons: Can fade or crack under prolonged sun exposure, less aesthetically pleasing than wood to some, limited color options compared to painted wood.
Composite Shutters
Composite shutters blend the benefits of wood and vinyl. They typically consist of a combination of materials, such as wood fibers and polymers, resulting in a product that is both durable and aesthetically pleasing. They offer a good balance between maintenance requirements and longevity, although they generally cost more than vinyl shutters.
- Pros: Durable, low maintenance, resistant to moisture and insects, aesthetically pleasing, available in a variety of colors and styles.
- Cons: More expensive than vinyl, can be more difficult to repair than vinyl, color options may be limited compared to painted wood.
Determining the Appropriate Shutter Size and Placement
Precise measurements and strategic placement are crucial for achieving the desired aesthetic and functional benefits of exterior shutters. Improper sizing can lead to an unbalanced appearance, while incorrect placement can compromise their effectiveness in providing shade or protection. This section details how to accurately measure your windows and doors and optimally position your shutters for a seamless and visually appealing integration with your home’s exterior.
Accurate measurements are paramount for a professional-looking and correctly functioning shutter installation. Inaccurate measurements will result in shutters that are too small, too large, or improperly aligned, detracting from your home’s curb appeal and potentially compromising their functionality. Taking the time to measure carefully will ensure a perfect fit and a successful installation.
Window and Door Measurement Guide
To ensure your shutters fit perfectly, follow these steps for accurate measurements. Remember to always measure multiple times to verify your accuracy.
- Measure the Width: Measure the width of the window or door frame at three points: the top, middle, and bottom. Record the narrowest measurement; this will be the width of your shutters. For a more traditional look, consider adding 1-2 inches to this measurement for each shutter panel, allowing for a slight overlap.
- Measure the Height: Similarly, measure the height of the window or door frame at three points: the left, center, and right. Again, record the narrowest measurement. As with width, you may want to add a small amount (1-2 inches) for a more traditional, overlapping look. This extra space allows for proper alignment and prevents gaps.
- Measure for Multiple Panels: If you plan to use multiple shutter panels per window or door, divide the total width by the desired number of panels to determine the width of each individual panel. Ensure that the total width of all panels accounts for the overlap, if desired.
- Consider the Frame: Account for the window or door frame’s depth. The shutters should be wide enough to cover the frame without obstructing the opening mechanism. Consider adding a small amount to the width measurement if needed.
- Document Measurements: Carefully record all measurements, noting which measurement corresponds to which window or door. It’s best to create a detailed diagram or spreadsheet to avoid confusion during ordering.
Optimal Shutter Placement
The placement of your shutters significantly impacts their visual appeal and functionality. Strategically positioned shutters enhance your home’s aesthetics and optimize their practical benefits.
Proper placement involves considering both the window or door frame and the overall facade of your home. Shutters should be positioned to complement the architectural style of your house while also providing sufficient coverage for sun protection or visual enhancement.
- Alignment with Window Frame: For a classic look, shutters are typically installed directly against the window or door frame, allowing the shutters to either sit flush or slightly overlap the frame.
- Consider the Facade: The placement of shutters should harmonize with other architectural features of your home, such as the roofline, siding, and other exterior elements. For example, shutters that are too large or too small relative to the windows and the overall house may look out of place.
- Visual Balance: Ensure the shutters are evenly spaced and aligned across multiple windows to create a balanced and harmonious appearance. Uneven spacing or misaligned shutters can disrupt the overall visual appeal.
Selecting the Perfect Shutter Style and Design
Choosing the right shutter style is crucial for achieving the desired aesthetic appeal for your home. The style you select will significantly impact your home’s overall curb appeal, complementing or contrasting with its existing architectural features. Consider the style of your home and the look you want to achieve before making a decision. Different styles evoke different feelings and can dramatically alter the perceived age and character of your house.
Shutter styles are diverse, each offering unique visual characteristics. The most common styles include raised panel, louvered, and board and batten shutters. Raised panel shutters feature a recessed center panel, creating a classic and elegant look. Louvered shutters, with their adjustable slats, offer both style and functionality, controlling light and airflow. Board and batten shutters, characterized by wide vertical boards and narrow battens, exude a rustic and traditional charm. The visual impact of each style varies considerably, affecting how your home is perceived.
Shutter Style Comparisons
The following table compares the features and suitability of different shutter styles for various architectural styles. Choosing the right style depends heavily on the existing architectural elements of your home to create a cohesive and visually pleasing result. For example, a contemporary home might benefit from the clean lines of board and batten shutters, while a Victorian home might be enhanced by the intricate detailing of raised panel shutters.
| Shutter Style | Features | Visual Impact | Suitable Architectural Styles |
|---|---|---|---|
| Raised Panel | Recessed center panel, classic design, often detailed molding | Elegant, traditional, formal | Colonial, Victorian, Craftsman |
| Louvered | Adjustable slats, allows for light and air control, versatile design | Classic, functional, adaptable | Colonial, Cape Cod, Ranch, Farmhouse |
| Board and Batten | Wide vertical boards and narrow battens, simple design | Rustic, traditional, clean lines | Farmhouse, Craftsman, Contemporary (with careful consideration) |
| Bahama Shutters | Louvered shutters angled downwards, offer shade and protection from rain | Tropical, breezy, relaxed | Coastal, Mediterranean, Caribbean |
Considering Functionality and Practical Aspects
Beyond aesthetics, exterior shutters offer significant functional benefits that directly impact your home’s comfort and security. Choosing shutters with functionality in mind ensures a worthwhile investment that pays off in both convenience and long-term value. This section will explore the practical considerations that should guide your selection.
Shutters play a surprisingly versatile role in enhancing a home’s energy efficiency and privacy. Their strategic placement and design can significantly reduce energy consumption by controlling sunlight and heat transfer. Furthermore, well-chosen shutters provide a crucial layer of security and privacy, deterring potential intruders and shielding your home’s interior from prying eyes.
Shutter Operational Mechanisms and Features
The method by which your shutters operate significantly influences their functionality and convenience. Consider the following factors when evaluating operational mechanisms: hinged shutters, offering a classic, fully operational design; fixed shutters, providing a purely aesthetic contribution; and louvered shutters, allowing for adjustable light and ventilation control. The choice depends on your desired level of control and the architectural style of your home. For example, a historic home might benefit from the traditional look and functionality of hinged shutters, while a modern home might prefer the sleek simplicity of fixed shutters or the light-managing capabilities of louvered shutters. Consider also the ease of operation, especially if you plan to open and close the shutters frequently. Durability of the hinges and locking mechanisms is crucial for longevity.
Shutter Design and its Impact on Light and Ventilation
Different shutter designs affect natural light and ventilation in distinct ways. Solid panel shutters, for instance, completely block light and airflow when closed, providing maximum privacy and insulation. Conversely, louvered shutters allow for adjustable light and ventilation control. By adjusting the louvers, you can regulate the amount of sunlight entering your home while still enjoying some degree of privacy. Consider the climate in your area. In hot climates, louvered shutters are preferable for ventilation and temperature regulation, while in colder climates, solid panel shutters might be better suited for insulation. The size and spacing of louvers also impact the amount of light and air passing through. Wider louvers allow for more light and ventilation, while narrower louvers provide more privacy and insulation.
Budgeting and Installation
Planning for the installation of exterior shutters requires careful consideration of both material costs and labor expenses. A realistic budget ensures a smooth project without unexpected financial burdens. Understanding the various factors influencing the overall cost will empower you to make informed decisions.
The total cost of your shutter project will depend heavily on several interconnected factors. The size and number of shutters needed will naturally impact the material cost. Larger, more elaborate designs will inherently be more expensive than simpler, smaller ones. The material itself—whether wood, vinyl, composite, or aluminum—will significantly influence the price, with wood typically being the most expensive and vinyl often the most affordable. Adding custom features, such as special paint colors or intricate detailing, will further increase the expense. Finally, the installation method, whether DIY or professional, will greatly affect the overall budget. A professional installation will add labor costs, but often saves time and potential mistakes.
Shutter Installation Methods
Different shutter types and materials lend themselves to different installation methods. Wood shutters, for example, often require more precise measurements and careful handling due to their weight and susceptibility to damage. Their installation frequently involves attaching them directly to the window frame or the house siding using screws or specialized brackets. Vinyl shutters, on the other hand, are often lighter and easier to install, sometimes utilizing simpler methods like adhesive or clips. Composite and aluminum shutters might employ a combination of these techniques, depending on the specific product and manufacturer’s recommendations. For instance, a heavy composite shutter might require a more robust fastening system similar to wood, while a lightweight aluminum shutter could potentially use simpler fastening methods.
Factors to Consider When Choosing an Installer or Undertaking DIY Installation
Before embarking on shutter installation, it’s crucial to weigh the pros and cons of DIY versus professional installation. A professional installer offers experience, specialized tools, and warranty protection. However, this expertise comes at a cost. A DIY approach can save money, but it requires time, skills, and the right tools.
- Experience and Reputation: If choosing a professional, research their experience and read online reviews to assess their reputation for quality workmanship and customer satisfaction. Check their licensing and insurance coverage.
- Cost Transparency: Obtain detailed quotes from multiple installers, ensuring they clearly outline all costs, including labor, materials, and any potential additional charges.
- Warranty and Guarantees: Inquire about warranties offered on both the shutters and the installation work. A reputable installer will stand behind their work.
- Timeline and Scheduling: Discuss the expected timeline for completion and ensure the schedule aligns with your expectations.
- Materials and Tools (DIY): If undertaking DIY installation, ensure you have all necessary tools, materials, and safety equipment before starting the project. Accurate measurements are paramount to avoid costly mistakes.
- Skill Assessment (DIY): Honestly assess your own skills and comfort level with home improvement projects. If unsure, seeking professional guidance or assistance for specific steps might be prudent.
Closing Notes
Selecting the perfect exterior shutters significantly impacts your home’s overall aesthetic and functionality. By carefully considering your home’s style, choosing appropriate materials, and understanding proper sizing and placement, you can transform your home’s exterior. Remember, the right shutters enhance curb appeal, improve energy efficiency, and add a touch of personalized elegance. This guide provides a comprehensive framework to help you confidently make these crucial decisions, resulting in a beautifully enhanced home exterior.


